Wednesday, November 20, 2024

Profitable Cutting Board Projects to Sell This Holiday Season

Posted by Alton with No comments
Profitable Cutting Board Projects to Sell This Holiday Season

Profitable Cutting Board Projects to Sell This Holiday Season

Hey there, crafty friends! The holiday season is just around the corner, and that means it's time to get those creative juices flowing. What better way to show your loved ones you care than with a handcrafted gift? And what better gift than a beautiful, functional cutting board?

Cutting boards are always a popular choice for holiday gifts, and for good reason. They're practical, personalized, and can be made with a variety of materials. Plus, they're something that people will use and appreciate for years to come.

So, if you're looking for a profitable woodworking project to sell this holiday season, look no further than cutting boards! In this guide, we'll cover some of the hottest cutting board trends and ideas to help you get your creative juices flowing.

Popular Cutting Board Styles and Trends

When it comes to cutting boards, the options are endless. From classic designs to modern and trendy styles, there's a cutting board out there for everyone. Here are some of the most popular styles and trends you can consider for your holiday inventory:

The Classic Butcher Block

This style never goes out of style. These sturdy boards are made from hardwood and feature a timeless, rustic look. Choose from different wood types like maple, cherry, walnut, or even reclaimed wood. Consider adding a custom engraved design or a personalized message for an extra special touch.

Modern Minimalism

For those who prefer a more streamlined aesthetic, minimalist cutting boards are a great option. These boards often feature clean lines, simple shapes, and a focus on functionality. Choose a light wood like maple or bamboo for a light and airy feel or a darker wood like walnut for a more modern touch.

Epoxy Resin Accents

Epoxy resin is the star of the show in this trendy cutting board style. Add pops of color, texture, and even embedded objects like dried flowers, shells, or crystals to create stunning and unique pieces. The possibilities are truly endless. This can be a great way to showcase your personality and creativity!

Charcuterie Boards

Charcuterie boards are all the rage! These boards are designed to be used for serving cheese, meats, and other appetizers. They often feature a combination of wood and other materials like slate, marble, or ceramic. You can even incorporate grooves or divots for holding dips, olives, and other small bites.

Marketing Tips for Selling Your Cutting Boards

Now that you've got some great ideas for cutting board designs, it's time to think about how you'll market them. Here are some tips for attracting buyers:

  • Target your audience. Who are you trying to reach with your cutting boards? Are you targeting home cooks, professional chefs, or gift-givers? Once you know who your ideal customer is, you can tailor your marketing messages accordingly.
  • Highlight your unique selling points. What makes your cutting boards special? Is it the quality of the wood, the craftsmanship, the design, or something else? Make sure to promote your unique selling points in your product descriptions and marketing materials.
  • Use high-quality photos. Photos are essential for showcasing your cutting boards. Use natural lighting and a simple background to highlight the beauty of your products.
  • Be active on social media. Social media is a great way to connect with potential customers and promote your products. Share photos of your cutting boards, behind-the-scenes glimpses of your woodworking process, and customer testimonials.
  • Attend craft fairs and markets. Craft fairs and markets are a great opportunity to sell your cutting boards in person and meet potential customers.
  • Offer personalized services. Consider offering customers the option to personalize their cutting boards with engravings, custom shapes, or special finishes. This will help you stand out from the competition and offer a more unique product.
  • Pricing Your Cutting Boards

    Pricing your cutting boards correctly is crucial for both profit and attracting customers. Here are some factors to consider:

  • Cost of materials. The type of wood, resin, or other materials you use will affect the price of your cutting board.
  • Time and labor. Factor in the time and effort you spend designing, cutting, sanding, finishing, and packaging your cutting boards.
  • Competition. Research the prices of similar cutting boards being sold online and at local craft fairs. You want to be competitive but also ensure your prices reflect the value of your craftsmanship.
  • Profit margins. Determine a profit margin that you are comfortable with. This will help you calculate your selling price while ensuring you're making a decent profit.
  • Creating Profitable Cutting Board Designs

    Now that you've got the basics down, let's delve into some creative ideas that can help you make a splash with your cutting board offerings this holiday season.

    Holiday Themed Cutting Boards

    Embrace the holiday spirit! Create cutting boards with festive designs like snowflakes, Christmas trees, reindeer, or holiday wreaths. You can use wood burning techniques, stencils, or even inlay techniques to create these designs. These make wonderful gifts for friends and family.

    Personalized Cutting Boards

    Add a personal touch with engravings or custom shapes. You can add a name, a special date, a quote, or even a family crest. This creates a unique and cherished gift that shows you put extra effort into it.

    Multi-Purpose Cutting Boards

    Don't be afraid to think outside the box. Create cutting boards that double as serving trays, charcuterie boards, or even cheese boards. Add grooves, handles, or even a built-in cheese knife holder to make them extra functional.

    Unique Shapes and Sizes

    Break away from traditional rectangular shapes. Experiment with round, oval, heart-shaped, or even animal-shaped cutting boards. This can add a touch of personality to your offerings and appeal to customers looking for something unique.

    Gift Set Combinations

    Boost sales with gift sets! Pair a cutting board with a matching set of knives, a cutting board oil, or even a personalized cutting board stand. This presents a complete package and increases the value perception for your customers.

    Safety and Care Tips

    It's important to consider safety and care for your cutting boards to ensure your customers get the most out of them. Here are a few key pointers:

  • Use food-safe finishes. Choose finishes that are safe for food contact and will protect the wood. Avoid using harsh chemicals or finishes that can leach into food.
  • Provide care instructions. Include care instructions with your cutting boards, explaining how to clean them properly, what type of oil to use, and how to avoid damage.
  • Disclose potential risks. Let customers know that cutting boards are not indestructible and may show signs of wear over time. It's important to use a sharp knife to avoid damage to the board.
  • Commonly Asked Questions

    What type of wood is best for cutting boards?

    There are many great options, but some of the most popular include maple, cherry, walnut, and bamboo. These woods are durable, easy to work with, and have a beautiful natural finish.

    What kind of finish should I use for cutting boards?

    Food-safe finishes are crucial. Look for mineral oil or beeswax-based finishes that are safe for food contact. You can also use a combination of oil and wax for added protection and durability.

    How do I price my cutting boards?

    Consider the cost of materials, your time and labor, the quality of your work, and the prices of similar cutting boards in the market.

    Where can I sell my cutting boards?

    You can sell your cutting boards online through platforms like Etsy, Shopify, or your own website. You can also sell them at local craft fairs, farmers' markets, or even at local stores.

    With a little creativity and effort, you can create beautiful and functional cutting boards that will be a hit this holiday season. Good luck and happy crafting!

    Tuesday, November 19, 2024

    How to Build a Tiered Plant Stand with Unique Features

    Posted by Alton with No comments
    How to Build a Tiered Plant Stand with Unique Features

    Building a Tiered Plant Stand with Unique Features

    Hey there, plant lovers! Are you tired of your plants crowding your windowsill or looking a bit drab on boring old shelves? Let's get creative and build a tiered plant stand that's not only functional but also a stunning centerpiece for your home. We'll add some unique features that'll make your stand stand out from the rest (pun intended!), adding a touch of personality and style.

    Planning Your Plant Stand Masterpiece

    Before you get your hands dirty (literally!), let's brainstorm a bit. Think about these things:

    • Size and Shape: How much space do you have? Do you want a tall, slim stand or a wider, shorter one? Will it be a corner piece or a freestanding stand?
    • Materials: Wood is a classic choice, but think about metal, reclaimed materials like pallets, or even bamboo for a more rustic feel. You can also combine different materials for a unique look.
    • Number of Tiers: How many plants do you want to showcase? Consider the height of your plants and the overall balance of the stand.
    • Unique Features: This is where your creativity shines! We'll dive into some exciting ideas in the next section.

    Once you have a general plan in mind, it's time to gather your tools and materials. We'll need a few basic woodworking tools, like a saw, drill, sander, and some screws and glue. For the materials, we'll use a combination of wood for the base and shelves, but you can adapt this depending on your chosen materials.

    Adding Unique Features to Your Plant Stand

    Okay, now for the fun part! Here are some ideas for adding a little "oomph" to your plant stand:

    1. Built-in Lighting

    Give your plants a glow-up! You can incorporate small LED lights into the stand's design. You can either use battery-powered fairy lights or hardwire some LED strips for a more permanent solution. This is great for providing extra light to your plants and creating a cozy, inviting ambiance in your space.

    2. Rolling Base

    Who says your plant stand has to be stationary? Add caster wheels to the base for easy maneuverability. This allows you to move your plant stand around as needed, rearranging your space or simply bringing your green friends closer to the light.

    3. Integrated Water Reservoir

    For those who struggle with remembering to water their plants, consider incorporating a built-in water reservoir into your stand. You can have a small, concealed container that holds water and allows it to seep into the pot's drainage holes through a series of small tubes. This will provide a steady supply of moisture for your plants, making them happy and thriving.

    4. Etched or Painted Designs

    Let your artistic side shine! Use a woodburning tool or paint to add unique patterns or designs to your plant stand. You could create geometric shapes, botanical motifs, or even personal quotes that inspire you. This will personalize your stand and make it truly one-of-a-kind.

    5. Rustic Elements

    For a rustic look, incorporate natural elements like bark, river stones, or driftwood into your design. You can attach these materials to the stand's base or shelves as decorative accents. They'll add a touch of nature to your plant stand and give it a more organic feel.

    Construction Guide: Building the Stand

    Okay, let's get down to the nitty-gritty. Here's a general guide for constructing your tiered plant stand. You can adapt these steps based on your chosen materials and design:

    1. Cut and Shape: Using your saw, cut the wood into the desired lengths and shapes for the base, shelves, and any additional supports.
    2. Assembly: Secure the base pieces together using screws and glue. You can use wood glue to reinforce the joints for greater strength.
    3. Add Shelves: Attach the shelves to the base using brackets or shelf supports. Make sure they are sturdy and level.
    4. Incorporate Features: Now's the time to add your unique features. Install the lights, wheels, or water reservoir system based on your design.
    5. Sand and Finish: Once your stand is assembled, sand all surfaces smoothly and apply a sealant or paint to protect the wood and give it a finished look.

    Remember, these are just general guidelines. Feel free to get creative and adapt the process to fit your specific design.

    Commonly Asked Questions

    Got questions? Here are some frequently asked questions about building a tiered plant stand:

    • What kind of wood should I use? Choose a strong and durable wood, like pine, oak, or plywood. If you're working with reclaimed materials, ensure they are sturdy and free of any harmful chemicals.
    • How do I attach the shelves? You can use shelf brackets, shelf supports, or even simple wood screws for attaching the shelves to the base. Consider the weight of the plants you plan to display when choosing your method.
    • How do I create a water reservoir? You can use a plastic container or a water-resistant material like resin to create a reservoir. Make sure it's sealed properly and has drainage holes to allow the water to seep into the plants' pots.
    • How can I make my stand more stable? Use sturdy materials, reinforce the joints with glue, and ensure all pieces are securely fastened. You can also add extra supports for stability.
    • What if I don't have any woodworking experience? Don't worry! You can start with a simpler design or ask for help from a friend or family member who is more experienced. There are also many tutorials and online resources available to guide you through the process.

    Building a tiered plant stand is a rewarding project that allows you to express your creativity and personalize your home. You can add your own flair to the design, incorporating unique features that reflect your style. So get your tools ready, gather your materials, and get ready to build a beautiful, functional plant stand that'll make your plants (and you) happy!

    How to Build Wooden Toys for All Ages That Will Grow with the Child

    Posted by Alton with No comments
    How to Build Wooden Toys for All Ages That Will Grow with the Child

    Building Wooden Toys That Grow with Your Child

    There's something truly special about wooden toys. The natural warmth, the tactile feel, and the enduring quality make them a timeless choice for kids of all ages. But what if you could create wooden toys that not only stand the test of time but also evolve with your child's development? That's where the magic of "growing toys" comes in. These toys are designed with versatility in mind, offering multiple levels of play as your child grows.

    Think beyond the typical blocks and stacking cups. Imagine building a wooden train set that transitions from a simple track to a complex railway system with bridges and tunnels. Or, consider a wooden dollhouse that transforms from a basic structure to a multi-story mansion with furniture and accessories. These are just a few examples of how you can create wooden toys that spark imagination and engage children for years to come.

    Understanding the Stages of Play

    Before we dive into specific toy ideas, let's talk about the different stages of play. This will help you understand how to design toys that cater to various developmental milestones:

    Sensorimotor Stage (Birth to 2 Years)

    Babies and toddlers are primarily focused on exploring the world through their senses. They love to touch, taste, and manipulate objects. Wooden toys during this stage should be safe, simple, and stimulating. Think about:

    • Teethers: Wooden teethers with textured surfaces provide comfort and sensory stimulation.
    • Stacking Rings: These encourage hand-eye coordination and problem-solving as babies learn to stack and unstack the rings.
    • Simple Puzzles: Large, chunky wooden puzzles with only a few pieces introduce the concept of matching and spatial reasoning.

    Preoperational Stage (2 to 7 Years)

    Preschoolers become increasingly imaginative and start to engage in pretend play. They develop language skills and begin to understand basic concepts like colors, shapes, and numbers. This is the perfect time to introduce toys that support:

    • Wooden Blocks: From simple building blocks to more intricate sets, blocks encourage creativity, spatial reasoning, and problem-solving.
    • Play Kitchens and Tool Sets: These inspire imaginative role-playing, encouraging social interaction and developing fine motor skills.
    • Wooden Vehicles and Animals: These toys can be used for imaginative storytelling, creating worlds, and developing social skills.

    Concrete Operational Stage (7 to 11 Years)

    Children in this stage begin to think more logically and abstractly. They can grasp complex concepts and enjoy challenges that require strategy and planning. Wooden toys can now become more intricate and encourage:

    • Construction Sets: More advanced wooden construction sets with gears, pulleys, and levers introduce the principles of engineering and mechanics.
    • Games and Puzzles: Wooden board games, puzzles, and card games encourage critical thinking, problem-solving, and strategic planning.
    • Art Supplies: Wooden easels, paintbrushes, and sculpting tools foster creativity and artistic expression.

    Designing Toys That Grow with Your Child

    Now that we understand the stages of play, let's talk about designing toys that can adapt to your child's evolving needs. Here are some key principles to keep in mind:

    Multifunctionality

    The core concept of a growing toy is its ability to serve multiple purposes. This can be achieved by incorporating different play possibilities within a single toy. For example, a wooden train set can be used for simple track play, building structures, or creating elaborate layouts as your child gets older.

    Open-Ended Play

    Avoid toys with fixed functions or overly structured play patterns. Instead, focus on toys that encourage creativity and open-ended exploration. Blocks, dolls, and construction sets allow children to create their own stories, scenarios, and worlds.

    Scalability

    Design toys that can be expanded or modified as your child's skills progress. This could mean adding more pieces, changing the rules of a game, or incorporating new elements into the toy's design. This allows the toy to remain engaging and challenging as your child grows.

    Specific Toy Ideas

    Let's get hands-on! Here are some specific wooden toy ideas that you can create to encourage learning and growth through different stages:

    Wooden Play Kitchen

    A classic play kitchen can be designed with several levels of play. Start with a simple structure with a stovetop and sink. As your child grows, you can add accessories like a refrigerator, oven, cabinets, and even a working play faucet.

    Wooden Train Set

    Begin with basic tracks and a train engine. Gradually add more tracks, bridges, tunnels, and even a train depot as your child's skills and imagination grow. You can also introduce different types of trains, carriages, and accessories to enhance the play experience.

    Wooden Dollhouse

    Start with a simple dollhouse with a few rooms. As your child grows, you can add furniture, accessories, and even a second story. You can also create a miniature world around the dollhouse, incorporating a garden, a fence, and other elements to encourage imaginative play.

    Wooden Building Blocks

    Wooden blocks are a timeless classic, and their versatility allows for endless possibilities. You can start with a simple set of blocks and add more as your child's skills develop. Encourage your child to build towers, houses, and other structures. You can also introduce different shapes, sizes, and textures to enhance the building experience.

    Building Your Own Wooden Toys

    Building your own wooden toys is a rewarding and fulfilling experience. It allows you to customize the toys to your child's specific interests and needs. Here are some tips to get you started:

    • Choose the Right Wood: Softwoods like pine or cedar are easy to work with and affordable. Hardwoods like maple or oak are more durable but require more skill to work with.
    • Safety First: Always use non-toxic paints and finishes for your wooden toys. Sand down any rough edges to ensure your child's safety.
    • Start Simple: Don't get overwhelmed by complex designs. Begin with simple projects and gradually work your way up to more intricate creations.
    • Get Creative: Don't be afraid to experiment with different designs and materials. You can add details like knobs, wheels, and other elements to make your toys more engaging.

    Commonly Asked Questions

    How much time do I need to invest in building wooden toys?

    The time commitment depends on the complexity of the project. Simple toys like building blocks or simple puzzles can be made in an afternoon. More complex toys like dollhouses or train sets may require several hours or even days to complete.

    What tools do I need to build wooden toys?

    For basic projects, you'll need a saw, a hammer, nails, screws, sandpaper, and wood glue. As you become more experienced, you may want to invest in more specialized tools like a drill press, router, and table saw.

    Where can I find plans for wooden toys?

    There are numerous online resources and books that offer free or paid plans for wooden toys. You can also find inspiration in craft stores or online marketplaces that sell woodworking plans.

    What are the benefits of building wooden toys?

    Building wooden toys offers several benefits, including:

    • Creating Unique Toys: You can personalize the toys to your child's specific interests and needs.
    • Developing Skills: Woodworking helps develop hand-eye coordination, problem-solving skills, and patience.
    • Connecting with Your Child: Building toys together can be a fun and bonding experience for you and your child.
    • Sustainability: Wooden toys are often more durable and can be passed down through generations.

    Building wooden toys that grow with your child is a rewarding and meaningful experience. It allows you to create lasting memories and provide your child with toys that encourage their imagination and development for years to come. So gather your tools, choose your wood, and let the creative journey begin!

    Monday, November 18, 2024

    Easy Birdhouse Projects for Craft Fairs and Markets

    Posted by Alton with No comments
    Easy Birdhouse Projects for Craft Fairs and Markets

    Easy Birdhouse Projects for Craft Fairs and Markets

    Hey there, crafty friends! Are you looking for a fun and easy project to make and sell at your next craft fair or market? Look no further than birdhouses! These little dwellings are a classic, charming, and always in demand. Plus, they're super versatile and can be customized in endless ways to fit any style and budget.

    Let's be honest, who doesn't love seeing cute little birds flitting around their backyard? Making birdhouses is a great way to combine your love for nature, creativity, and crafting. And the best part? You can make them in all shapes, sizes, and styles to fit your personal aesthetic and the preferences of your target audience. From rustic farmhouse chic to whimsical cottagecore, there's a birdhouse for everyone!

    But before we get into the specific projects, let's talk about why birdhouses are such a hot commodity at craft fairs and markets:

    • They're universally appealing. Birdhouses are a classic and timeless craft that appeals to a wide range of people, from seasoned bird watchers to casual nature enthusiasts. Everyone loves seeing birds in their garden, and a birdhouse can make that happen.
    • They're affordable to make. Birdhouses can be made using readily available and often inexpensive materials, making them a budget-friendly craft. You can even use recycled materials to give them a unique and eco-friendly touch.
    • They're easy to customize. You can personalize birdhouses in countless ways, from painting them different colors to adding embellishments and decorations. This allows you to offer unique and one-of-a-kind pieces that stand out from the crowd.
    • They're functional and decorative. Birdhouses are not just pretty ornaments; they actually serve a purpose by providing shelter for birds. This makes them a practical and thoughtful gift for anyone who enjoys nature.
    • They're portable and easy to transport. Birdhouses are compact and lightweight, making them easy to transport to craft fairs and markets. You won't have to worry about bulky or heavy items.

    So, now that you know why birdhouses are a great choice for craft fairs, let's dive into some easy and inspiring projects that you can start working on right away!

    Simple Birdhouse Projects for Beginners

    Here are some beginner-friendly birdhouse projects that are perfect for those who are new to woodworking or just want a quick and easy craft:

    The Classic Wooden Birdhouse

    This is the quintessential birdhouse design, and it's incredibly easy to make. You can find pre-cut birdhouse kits at most craft stores, or you can cut your own pieces from wood. Just follow the instructions, assemble the pieces, paint it, and add a decorative roof.

    Here are some tips for adding a personal touch:

    • Paint the birdhouse in a bold color that complements your garden.
    • Add a whimsical design to the roof using stencils or freehand.
    • Attach a small piece of wood to the front to create a landing perch.

    The Mason Jar Birdhouse

    This project is incredibly easy and budget-friendly. Simply use a clean glass mason jar as the main structure, and decorate it with colorful paint, decoupage, or fabric scraps. Attach a small piece of wood to the lid for a perch, and hang it up using twine or a decorative chain.

    Here are some tips for adding a personal touch:

    • Add glitter or rhinestones to the mason jar for a touch of sparkle.
    • Use natural elements like pine cones, twigs, or moss to decorate the jar.
    • Paint the mason jar with a beautiful scene like a forest or a meadow.

    The Recycled Cardboard Birdhouse

    This project is eco-friendly and uses recycled materials. Simply use a cardboard box or container as the base, cut out a hole for the entrance, and decorate it with paint, markers, or paper scraps. You can also add a small wooden perch or a hanging hook.

    Here are some tips for adding a personal touch:

    • Use recycled paper to create a textured surface on the cardboard.
    • Use markers to draw whimsical patterns or images on the cardboard.
    • Glue on beads, buttons, or other embellishments for a fun and unique look.

    More Advanced Birdhouse Projects

    If you're feeling confident, you can try these more advanced birdhouse projects that will impress your customers at the craft fair:

    The Birdhouse with a Gable Roof

    This project adds a touch of architectural detail to your birdhouse. It involves cutting angled pieces of wood for the roof and attaching them to the main structure. You can find detailed plans and instructions online or at craft stores.

    Here are some tips for adding a personal touch:

    • Add decorative trim around the edges of the roof or the entrance hole.
    • Paint the birdhouse in a muted color palette with weathered accents.
    • Attach a small flower box or planter to the side of the birdhouse.

    The Birdhouse with a Copper Roof

    This project adds a touch of rustic charm to your birdhouse. You'll need to purchase copper sheet metal to cover the roof, and then cut, shape, and attach it to the base. You can find detailed instructions online.

    Here are some tips for adding a personal touch:

    • Use a hammer to create subtle dimples or textures on the copper roof.
    • Paint the base of the birdhouse in a complementary color like green or blue.
    • Attach a small wooden plaque with the birdhouse's name or date.

    The Birdhouse with a Miniature Garden

    This project is perfect for garden lovers and those who want to create a unique and whimsical centerpiece for their homes. Simply use a small terracotta pot or planter as the base, attach a wooden roof or lid, and then plant tiny succulents, moss, or miniature flowers around the base. You can even add tiny figurines or other decorations for a touch of magic.

    Here are some tips for adding a personal touch:

    • Use a variety of small succulents and plants to create a colorful and interesting display.
    • Add tiny miniature fairy doors, gnomes, or other whimsical figures to the garden.
    • Use small rocks or pebbles to create a path or border for the garden.

    Tips for Selling Birdhouses at Craft Fairs

    Now that you've got your birdhouses ready, here are some tips for selling them at craft fairs and markets:

    • Choose a booth location that gets foot traffic. Try to set up your booth in a high-traffic area where shoppers will easily see your birdhouses. You can also use bright and eye-catching signs or banners to attract attention.
    • Display your birdhouses attractively. Use shelves, hooks, or tiered stands to display your birdhouses in a way that showcases their beauty and variety. Consider using natural elements like moss or branches to create a rustic and inviting display.
    • Price your birdhouses fairly. Research the prices of similar birdhouses online or at other craft fairs to make sure you're pricing your products competitively. Remember to factor in the cost of materials, labor, and your desired profit margin.
    • Offer a variety of birdhouse styles. Have a mix of different sizes, shapes, and colors to cater to different tastes and preferences. You can also offer birdhouses in sets, such as a set of three different sizes or a set of matching birdhouses for different rooms.
    • Provide information about your birdhouses. Include a small sign or tag with each birdhouse that provides information about its size, materials, and care instructions. You can also highlight any unique features or customizations that make your birdhouses special.
    • Be friendly and helpful. Engage with shoppers and answer any questions they may have about your birdhouses. Be enthusiastic about your craft and share your passion for birds and nature.

    Commonly Asked Questions

    Here are some questions that you might get asked about your birdhouses:

    • What type of bird will this house attract? This is a great question to answer because it shows you are knowledgeable about birds. Research the birds in your area and try to match the design and features of your birdhouses to their needs.
    • How do I clean and maintain the birdhouse? Simple! Tell customers to avoid harsh chemicals and just use a brush or a damp cloth to wipe away any dirt or debris.
    • What materials are used to make the birdhouse? Be transparent about your materials. Many shoppers appreciate knowing what materials are used, especially if they are eco-friendly or sustainable.
    • How do I hang the birdhouse? You can provide a simple rope or chain for hanging the birdhouse, or you can offer different types of mounting brackets that can be attached to trees or posts.
    • Can I customize this birdhouse? Offer custom painting, personalization, or decoration services to make your birdhouses even more unique.

    Good luck with your birdhouse project! I hope this guide has given you all the inspiration and information you need to create beautiful and functional birdhouses that will delight shoppers at your next craft fair.

    Wednesday, November 13, 2024

    DIY Modern Coffee Tables for Small Spaces That Are Easy to Build and Sell

    Posted by Alton with No comments
    DIY Modern Coffee Tables for Small Spaces That Are Easy to Build and Sell

    DIY Modern Coffee Tables for Small Spaces That Are Easy to Build and Sell

    In the realm of interior design, coffee tables serve as a cornerstone of living room aesthetics and functionality. Their presence not only adds a touch of elegance but also provides a platform for social gatherings, entertainment, and displaying cherished belongings. For small spaces, however, finding the perfect coffee table that seamlessly blends form and function can be a daunting task. Fear not, aspiring crafters and entrepreneurs! This article will guide you through the process of constructing stunning DIY modern coffee tables specifically tailored for compact living areas, offering simplicity, affordability, and immense selling potential.

    Understanding the Appeal of Modern Coffee Tables for Small Spaces

    Modern coffee tables, characterized by their clean lines, minimalist designs, and often unconventional materials, have gained immense popularity in contemporary interior design. Their sleek aesthetic complements various décor styles, while their compact footprint makes them ideal for smaller spaces.

    Key Features of Modern Coffee Tables for Small Spaces:

    • Minimalist Design: Avoid overly intricate details and opt for clean lines and simple geometric shapes.
    • Compact Footprint: Choose dimensions that fit seamlessly within your available space, minimizing visual clutter.
    • Lightweight Materials: Utilize lightweight materials like wood, metal, or acrylic to prevent the table from feeling overwhelming in a small room.
    • Versatile Functionality: Consider incorporating features like storage shelves, drawers, or a lift-top mechanism for added functionality.
    • Elevated Style: Select materials and finishes that exude a modern aesthetic, such as polished metals, natural wood stains, or sleek acrylic surfaces.

    Easy-to-Build DIY Coffee Table Projects for Small Spaces

    Let's dive into some inspiring DIY coffee table projects that are both visually appealing and easily constructed, even for beginners.

    1. The Simple and Elegant Pallet Coffee Table

    Pallet wood, a readily available and affordable material, provides a rustic yet modern aesthetic. This project involves minimal construction and can be customized with various finishes and hardware.

    • Materials: Pallet wood planks, wood glue, wood screws, sanding paper, stain or paint, optional: castor wheels.
    • Construction:
      1. Disassemble the pallet, ensuring the planks are free from damage.
      2. Sand the planks to achieve a smooth surface.
      3. Arrange the planks to create the desired table shape, securing them with wood glue and screws.
      4. Apply stain or paint to enhance the wood's natural beauty.
      5. Attach castor wheels (optional) to the underside of the table for easy mobility.

    2. The Industrial Pipe Coffee Table

    Embrace the industrial trend with a sleek pipe-based coffee table. This project utilizes readily available plumbing supplies, providing a unique and modern look.

    • Materials: Galvanized steel pipes (different sizes for legs and frame), pipe fittings, wood planks, wood screws, sander, stain or paint.
    • Construction:
      1. Cut the pipes to the desired lengths using a hacksaw.
      2. Assemble the frame using the pipe fittings, ensuring a stable and sturdy construction.
      3. Sand and stain or paint the wood plank to create the tabletop.
      4. Secure the tabletop to the pipe frame using screws.

    3. The Sleek and Modern Acrylic Coffee Table

    Acrylic sheets, available in a variety of sizes and thicknesses, offer a contemporary and transparent aesthetic. This project involves minimal construction and requires basic tools.

    • Materials: Acrylic sheets, wood glue, wood screws, sanding paper, optional: LED strip lights.
    • Construction:
      1. Cut the acrylic sheets to the desired dimensions using a jigsaw or a laser cutter (if available).
      2. Secure the acrylic sheets together using wood glue and screws to create the tabletop and base.
      3. Sand the edges for a smooth finish.
      4. Install LED strip lights (optional) underneath the tabletop for a captivating glow.

    Tips for Success: Building and Selling Your DIY Coffee Tables

    As you embark on your DIY coffee table journey, keep these crucial tips in mind to ensure success, both in construction and sales.

    1. Plan Your Design and Materials:

    • Inspiration: Explore design blogs, magazines, and online marketplaces for inspiration and trends.
    • Sketching: Create detailed sketches or digital designs to visualize the final product.
    • Material Sourcing: Choose materials that align with your budget and desired aesthetic.
    • Tools and Equipment: Ensure you have the necessary tools, such as saws, drills, sanders, and measuring tools.

    2. Construction and Quality Control:

    • Measure Twice, Cut Once: Accurate measurements are crucial for a well-built table.
    • Safety First: Wear appropriate safety gear, such as eye protection, gloves, and dust masks.
    • Sturdy Construction: Utilize strong adhesives, fasteners, and joinery techniques to ensure durability.
    • Finishing Touches: Sand and finish the table surfaces for a smooth and polished appearance.

    3. Marketing and Sales Strategies:

    • Target Audience: Identify potential customers who appreciate modern design and value affordability.
    • High-Quality Photography: Capture captivating images of your finished coffee tables in various settings.
    • Online Marketplaces: List your tables on popular online platforms like Etsy, Facebook Marketplace, or Craigslist.
    • Social Media: Showcase your work and engage with potential customers on social media platforms like Instagram and Pinterest.
    • Local Craft Fairs: Participate in craft fairs and markets to connect directly with buyers.

    Conclusion: Embrace the Power of DIY

    By embracing the DIY approach, you can create stunning modern coffee tables tailored to the needs of small spaces, offering both stylish solutions and rewarding financial opportunities. Remember to prioritize quality, embrace creativity, and leverage effective marketing strategies to maximize your selling potential. The world of DIY awaits, so seize the opportunity to transform your crafting passion into a lucrative business venture!

    Tuesday, November 12, 2024

    How to Build a Weather-Resistant Squirrel Den Box

    Posted by Alton with No comments
    How to Build a Weather-Resistant Squirrel Den Box

    Building a Weather-Resistant Squirrel Den Box: A Comprehensive Guide

    Providing a safe and comfortable haven for squirrels can enrich your backyard ecosystem and offer delightful observation opportunities. Constructing a weather-resistant squirrel den box is a rewarding project that requires careful planning and execution. This guide will walk you through the essential steps, ensuring your squirrel den is a sturdy and welcoming abode.

    Choosing the Right Materials and Design

    Selecting the Wood

    The most suitable wood for a squirrel den box is pressure-treated lumber, specifically pine or cedar. These woods are naturally resistant to decay, insects, and moisture, ensuring longevity for your squirrel shelter. Avoid using treated lumber that contains arsenic, as it can be harmful to wildlife. Always wear gloves and a mask when working with treated lumber.

    Dimensions and Design Considerations

    The optimal dimensions for a squirrel den box are approximately 12 inches wide, 12 inches high, and 16 inches deep. This provides ample space for a squirrel to move around comfortably and store food. The entry hole should be a circular opening with a diameter of 3-4 inches, high enough to allow the squirrel to easily enter and exit.

    For additional weather protection, consider these design elements:

    • Overhang: A slight overhang above the entry hole will shield the opening from direct rain and snow.
    • Drainage Holes: Drill a few small drainage holes in the bottom of the box to allow water to escape, preventing mold and rot.
    • Ventilation: Include ventilation holes on the sides of the box to promote air circulation and prevent moisture buildup.

    Assembling the Squirrel Den Box

    Cutting and Preparing the Wood

    Using a circular saw or a handsaw, carefully cut the lumber to the required dimensions. Ensure all cuts are precise and clean. Sand the edges of the wood to eliminate any rough spots that could irritate the squirrel.

    Building the Box

    Construct the box by assembling the side panels, the back, and the bottom. Use galvanized screws or nails to fasten the pieces together, ensuring strong and secure connections. The top of the box can be made from a separate piece of wood that can be hinged for easy cleaning and access.

    Creating the Entry Hole

    Using a drill bit or a jigsaw, create the circular entry hole. Ensure the hole is placed high enough to allow the squirrel to enter and exit easily. The overhang above the entry hole can be constructed using a separate piece of wood attached to the front panel.

    Adding Drainage and Ventilation Holes

    Drill a few small drainage holes in the bottom of the box to allow water to escape. Drill ventilation holes on the sides of the box to promote air circulation and prevent moisture buildup.

    Finishing the Box

    After the construction is complete, apply a weatherproof sealant to the exterior of the box, including the edges and seams. This will further enhance the den's resistance to moisture and ensure a long lifespan.

    Installing the Squirrel Den Box

    Choosing the Location

    The location of the squirrel den box is crucial for its effectiveness. Choose a spot that provides protection from predators, direct sunlight, and heavy winds. An ideal location would be against a tree, a sturdy fence post, or a wall. Aim for a height of at least 6-8 feet from the ground.

    Mounting the Box

    Mount the squirrel den box securely to the chosen location using heavy-duty screws or brackets. Ensure the box is level and stable to prevent it from falling or tilting.

    Encouraging Squirrel Occupancy

    Once installed, you can entice squirrels to occupy the den by placing a small amount of birdseed or nuts inside. Be patient as it may take some time for squirrels to discover and inhabit the new shelter. Avoid checking the box frequently as this could disturb the squirrels.

    Maintaining the Squirrel Den Box

    Over time, it's essential to inspect the den box for wear and tear. Periodic cleaning will help ensure the den remains comfortable for the squirrels. Here are some maintenance tips:

    • Regular Inspection: Check the box every few months for any signs of damage, decay, or insect infestation.
    • Cleaning: Clean out the den box at least once a year, removing any accumulated debris, nesting material, or droppings. Use a mild soap solution and a brush for cleaning, and allow the box to dry completely before reinstalling it.
    • Repairs: If you notice any damage, promptly repair it with the appropriate materials, using screws, nails, or glue.

    Ethical Considerations

    It's crucial to remember that providing a shelter for squirrels is a commitment. You should be prepared to maintain the den box over its lifespan. Ensure that the location you choose is safe for the squirrels, and that you are not interfering with their natural behaviors.

    Observe the squirrels from a distance and avoid disturbing them. Respect their privacy and provide them with a peaceful environment.

    Conclusion

    Building a weather-resistant squirrel den box is an enjoyable and rewarding project. It provides a safe and comfortable haven for these fascinating creatures, enriching your backyard biodiversity. By following the steps outlined in this guide, you can ensure your squirrel den is a sturdy and welcoming home for generations to come.

    Perfect Plans for a DIY Squirrel Box

    Posted by Alton with No comments
    Perfect Plans for a DIY Squirrel Box

    Building a Cozy Home for Your Friendly Neighborhood Squirrel

    Have you ever noticed the playful antics of squirrels in your backyard? These nimble creatures are a delightful sight, but they also need a safe and comfortable place to call home. Building a squirrel box is a rewarding project that provides a much-needed shelter for these charming animals. Let's dive into the details of creating a squirrel haven that will attract them to your yard.

    Choosing the Right Location

    The location of your squirrel box plays a crucial role in attracting your furry tenants. Squirrels prefer a spot that offers protection from predators and the elements. Here are some key factors to consider:

    • Height: Place the box at least 10 feet above ground to deter predators like cats and raccoons.
    • Tree selection: Choose a sturdy tree with branches strong enough to support the weight of the box. Ideally, pick a tree with a thick trunk for added stability.
    • Access: Make sure the box is accessible to squirrels. Choose a location that provides an easy path for them to reach the entrance.
    • Protection from weather: Position the box on the south or east side of the tree to minimize exposure to wind and rain.

    Gathering Your Supplies

    Before you begin building, gather the essential materials. Here's a comprehensive list:

    • Wood: Choose a rot-resistant wood like cedar, redwood, or pressure-treated pine. A 1x8 inch board is a common size for the walls and roof.
    • Screws: Use galvanized screws to prevent rust. Choose screws that are long enough to securely fasten the wood pieces.
    • Wood glue: This will help reinforce the joints and create a stronger bond.
    • Weatherproof paint or stain: Protect your box from the elements by applying a durable finish.
    • Metal flashing: This will help prevent water from seeping into the box.
    • Entry hole saw: This will create the perfect-sized entry hole for your squirrel guests.

    Building the Squirrel Box

    Now, let's get our hands dirty! Follow these steps to build your squirrel box:

    Constructing the Base and Walls

    Start by creating the base of your box. Cut two pieces of wood to the desired length and width. These pieces will form the floor of the box. Next, cut four pieces of wood to form the walls. Make sure the walls are tall enough to provide ample space for the squirrels. Attach the walls to the base using wood glue and screws.

    Adding the Roof

    Cut two pieces of wood to the same dimensions as the base. These pieces will form the roof of your box. Attach the roof pieces to the walls, creating a slight overhang to protect the entrance from rain. Secure the roof using wood glue and screws.

    Creating the Entrance Hole

    Use an entry hole saw to cut a 3-inch diameter hole in one of the walls. This is the perfect size for squirrels to enter and exit the box.

    Adding Ventilation and Finishing Touches

    Drill a few small holes in the back wall of the box to allow for air circulation. This will prevent the box from getting too humid. Finish by adding a layer of weatherproof paint or stain to protect your box from the elements.

    Installing Your Squirrel Box

    Once your squirrel box is complete, it's time to install it in its chosen location. Securely attach the box to the tree using heavy-duty wire or straps. Place the box on the branch, ensuring it's level and stable. Don't forget to add a piece of metal flashing around the entrance hole to prevent water from dripping inside.

    Tips for Attracting Squirrels

    Now that you've created a cozy home, it's time to attract your furry friends! Try these tips:

    • Place the box near a food source: Squirrels love nuts and seeds. Place the box near a bird feeder or a tree with nuts.
    • Provide a water source: Set out a shallow dish of water near the box. Squirrels need hydration, especially during hot weather.
    • Keep it clean: Regularly clean the box to remove debris and droppings. A clean box will be more inviting to squirrels.

    Building a squirrel box is a fun and rewarding project that benefits these delightful creatures. By providing them with a safe haven, you'll enjoy the joy of watching them play and thrive in your backyard. So, gather your supplies, put on your DIY hat, and get building!

    DIY Birdhouse: How to Build One with Features for Winter Use

    Posted by Alton with No comments
    DIY Birdhouse: How to Build One with Features for Winter Use

    Build a Birdhouse for Winter Friends

    As the leaves turn, the days grow shorter, and the air chills, you might think the birds have flown south for the winter. But some feathered friends stick around, braving the cold to find a cozy place to roost. If you want to make your yard a winter wonderland for birds, building a birdhouse specifically designed for cold weather is a great way to do just that!

    Building a birdhouse can be a fun and rewarding project, and it’s a great way to connect with nature. Not to mention, it’s a super budget-friendly way to attract birds to your yard! Plus, watching the birds flit around your winter-ready birdhouse is a surefire way to brighten up even the coldest days.

    Let’s get started with the basics!

    What You’ll Need

    Before you start hammering and sawing, make sure you have everything you need. Gather these materials:

    • Wood: Pine, cedar, or redwood are good choices for birdhouses. They’re lightweight, easy to work with, and naturally resistant to decay. You’ll want to use untreated wood, as treated wood can be toxic to birds.
    • Screws: Use screws that are long enough to go through the wood and into the next piece. Avoid using nails, as they can be difficult to remove if you need to repair the birdhouse later on.
    • Glue: Wood glue will help keep the pieces of your birdhouse together and prevent them from warping.
    • Paint: If you want to paint your birdhouse, choose a non-toxic paint that is safe for birds. You don't have to paint the house, however. Leaving the wood natural provides some insulation for the birds.
    • Weatherproofing: A coat of exterior-grade sealant or paint will help protect your birdhouse from the elements. This is especially important for a winter birdhouse because you want it to be able to withstand the cold and wet weather.
    • Measuring tape: To get your dimensions just right.
    • Pencil: To mark your wood for cutting.
    • Saw: You’ll need a saw to cut your wood to size. A handsaw, circular saw, or jigsaw will work.
    • Drill: To drill holes for the screws.
    • Screwdriver: To drive the screws into the wood.
    • Sandpaper: To smooth out any rough edges.
    • Safety glasses and gloves: For protection while you're working.

    Planning Your Winter Birdhouse

    Now that you have your supplies ready, let’s think about design! There are lots of birdhouse plans online, but we’re going to create one specifically for our feathered friends who stay through the winter. Here's how we'll make it extra cozy:

    Size Matters

    The size of your birdhouse will depend on the type of birds you want to attract. For wintering birds like chickadees, nuthatches, and downy woodpeckers, you'll want to make a smaller birdhouse. Choose a house with a 1 1/2 inch to 2 inch entrance hole.

    Consider your local birds and their needs! A larger birdhouse with a 2 1/2 inch entrance hole might be better for wrens or house finches. If you're not sure, it's always better to err on the side of a smaller entrance hole.

    Insulation is Key

    To keep your birdhouse occupants warm, insulation is super important. Here are some great ways to add insulation:

    • Wood shavings or sawdust: Fill the bottom of the birdhouse with about 1 to 2 inches of wood shavings or sawdust. It's a natural and inexpensive way to add insulation.
    • Insulating foam board: You can cut a piece of insulating foam board to fit the bottom of your birdhouse. It provides excellent insulation and is available at most hardware stores.
    • Double walls: Building a double-walled birdhouse with a small air gap in between the walls provides a natural layer of insulation. Think of it like a mini-igloo for your birds!

    Adding a Roosting Perch

    Many winter birds prefer to perch outside the house, especially during cold weather. Add a small, sturdy perch outside the entrance hole, about 1/2 inch away from the house. This allows them to take shelter from the wind and snow.

    Entrance Hole Placement

    It’s crucial to place the entrance hole on the side of the birdhouse, facing away from the prevailing wind. This provides additional protection from the elements.

    Building Your Birdhouse

    Now, let's build!

    Step 1: Cut the wood

    Using your plans and measuring tape, cut the wood for the front, back, sides, top, and bottom of the birdhouse. Remember to add a few inches to the bottom of the back piece for the roof overhang. Use your saw and make sure to wear safety glasses and gloves. Be careful!

    Step 2: Create the entrance hole

    Mark and cut the entrance hole on the front piece of the birdhouse. Use your saw or drill for this, and ensure the hole is centered and the correct size.

    Step 3: Assemble the birdhouse

    Attach the sides and bottom of the birdhouse to the back piece using screws. You can use wood glue to reinforce the joints, too. Be sure to predrill holes to avoid splitting the wood.

    Step 4: Add the roof

    Attach the roof to the top of the birdhouse. Make sure the roof overhangs slightly to protect the inside from rain and snow. Use screws and wood glue to secure it.

    Step 5: Attach the perch

    Secure a small, sturdy perch outside the entrance hole. You can make the perch from a small branch or piece of wood. Make sure it's about 1/2 inch away from the birdhouse and secure it with screws.

    Step 6: Finish the birdhouse

    Sand down any rough edges to make your birdhouse smooth and safe for the birds. You can also add a coat of non-toxic paint or sealant to protect the wood and make it look good!

    Setting Up Your Birdhouse

    Now you have a cozy winter birdhouse ready to be enjoyed! Here are a few tips for choosing the perfect spot for your new home:

    • Facing South: Facing the south will help your birdhouse get as much sunshine as possible. This will help keep it warm during cold weather.
    • High Up: Position the birdhouse at least 5 feet off the ground. This helps to protect it from predators and gives birds a clear view of their surroundings.
    • Out of the Wind: Try to find a location protected from strong winds. Think about trees or buildings that might offer natural shelter.
    • Near Trees or Shrubs: Birds feel safer when they have natural cover nearby.
    • Away from Busy Areas: Place your birdhouse away from busy areas, such as sidewalks and roads.

    A Winter Wonderland for Birds

    Once you've placed your birdhouse, it's time to make it extra inviting for your feathered friends.

    Winter Feeders: Offering a variety of winter birdseed, like sunflower seeds, suet, and millet, will attract more birds to your yard.

    Water Source: Birds need water to drink and bathe, even in the winter! Keep a birdbath filled with fresh water, or consider using a heated birdbath to keep the water from freezing.

    Keep it Clean: Check your birdhouse periodically and clean it out in the spring. Remove any old nesting materials and add fresh wood shavings or sawdust.

    Building a winter birdhouse is a great way to connect with nature and help our feathered friends survive the cold. By adding a little extra insulation, a perch, and a thoughtful location, you'll create a cozy haven for winter birds to enjoy. Who knows, you might even see some new species visiting your backyard!

    Building a Cold Frame for Less Than $50

    Posted by Alton with No comments
    Building a Cold Frame for Less Than $50

    Build a Cold Frame for Less Than $50

    Do you want to give your garden a head start in the spring or extend the growing season into the fall? Then build a cold frame! This simple structure can help protect your plants from the elements and provide them with a warm, sheltered environment for growth.

    And the best part? You can build a cold frame for less than $50. That's right - you don't need a lot of money to build a simple cold frame that will get the job done.

    Here's what you'll need:

    Materials

    • Wooden pallets: These are readily available for free or very cheap at many businesses. Use sturdy pallets in good condition.
    • 2x4s: These will form the frame of your cold frame. You'll need enough to create a rectangle or square that's the size you want.
    • Screws or nails: Use whatever you have on hand.
    • Plastic sheeting or greenhouse film: This will act as the cover for your cold frame. Choose a material that is strong and durable.
    • Hinges: These will be used to attach the cover to the frame.
    • Heavy-duty clips or clamps: These will be used to secure the cover to the frame in windy conditions.
    • Optional: Soil, seeds, and starter plants.

    Building the Cold Frame

    Follow these simple steps to create your cold frame.

    Step 1: Build the base.

    Take two wooden pallets and place them side by side. Use the 2x4s to create a frame that extends the length of the pallets. Make sure the frame is level and secure it to the pallets with screws or nails. If your pallets are very wide, you can cut them in half to create a more manageable size.

    Step 2: Construct the lid.

    Use the 2x4s to build a frame for the lid of your cold frame. It should be the same size as the base. You can use the same pallets to build the lid, just cut them into a rectangle.

    Step 3: Attach the lid.

    Attach the lid to the base of your cold frame using hinges. This will allow you to easily open and close the lid to access your plants.

    Step 4: Cover the lid.

    Cover the lid of your cold frame with your chosen plastic sheeting or greenhouse film. Secure the cover to the lid with heavy-duty clips or clamps.

    Step 5: Finish the frame.

    Use some soil to fill the cold frame. You can add extra potting soil to the base if desired, or use the soil already found in the pallets. Then you're ready to plant!

    Using your cold frame

    Once your cold frame is built, you can start using it to grow your plants. Here are a few tips:

    • Choose plants that are appropriate for the climate you live in.
    • Keep the soil moist but not waterlogged. Water your plants regularly.
    • Open the lid of your cold frame on warm days to ventilate the plants.
    • Close the lid at night to protect your plants from frost.
    • If you live in an area with harsh winters, you may need to cover your cold frame with an extra layer of insulation.

    That's it! You can use your cold frame to extend your growing season and start your garden plants early in the spring. It's a simple, inexpensive, and rewarding project that will give you a head start on gardening.

    Step-by-Step Cold Frame Instructions in PDF Format

    Posted by Alton with No comments
    Step-by-Step Cold Frame Instructions in PDF Format

    Building a Cold Frame: A Step-by-Step Guide

    A cold frame is a simple, low-cost structure that extends your gardening season, allowing you to start seeds early in the spring or protect delicate plants during the fall and winter. Building a cold frame is a rewarding project that requires basic construction skills and readily available materials. This guide provides a step-by-step process to help you create your own cold frame.

    Materials You'll Need:

    Before you begin, gather the following materials:

    • Wood for the frame: Use pressure-treated lumber for longevity. Choose 2x4s for the sides and 2x6s for the base.
    • Glass or polycarbonate panels: These materials will provide insulation and sunlight. Glass is more affordable but heavier and more prone to breakage. Polycarbonate is lighter, more durable, and offers better insulation.
    • Hinges: Choose heavy-duty hinges to support the lid.
    • Screws: Use exterior-grade screws for both wood and glass/polycarbonate.
    • Silicone sealant: Apply sealant to ensure a watertight seal around the glass/polycarbonate panels.
    • Staple gun and staples: Use these to secure the glass/polycarbonate panels to the frame.
    • Measuring tape, saw, drill, and screwdriver: These are essential tools for construction.
    • Safety glasses and gloves: Protect yourself while working.

    Step 1: Determine the Size and Location

    Choose a location for your cold frame that receives at least 6 hours of sunlight per day. The area should be relatively level and well-drained. Consider the size you need based on the plants you'll be growing.

    Step 2: Build the Frame

    1. Cut the wood to size: Use a saw to cut the 2x6s for the base and the 2x4s for the sides. Measure carefully to ensure the frame is square and fits the desired dimensions.
    2. Assemble the base: Screw together the 2x6s to form the rectangular base. Ensure the corners are secure.
    3. Attach the sides: Screw the 2x4s vertically to the base, forming the sides of the cold frame. Ensure the sides are level and plumb.
    4. Reinforce the frame: Add additional support by installing bracing across the sides.

    Step 3: Install the Lid

    1. Cut the lid panels: Measure the interior dimensions of the frame and cut the glass or polycarbonate panels to size.
    2. Attach the hinges: Screw the hinges to the frame, ensuring they are positioned securely.
    3. Secure the panels: If using glass, apply silicone sealant to the edges of the panels and then attach them to the frame with screws. For polycarbonate, use a staple gun to secure the panels to the frame.
    4. Add a handle: Attach a handle to the lid for easy opening and closing.

    Step 4: Finishing Touches

    1. Paint or stain (optional): Add a coat of paint or stain to protect the wood and enhance the appearance of your cold frame.
    2. Fill with soil: Prepare the soil inside the cold frame by adding compost or other amendments.
    3. Add a ventilation system: A small window or vent can be added to the lid to regulate temperature and humidity.

    Using Your Cold Frame

    Once your cold frame is built, it's ready to use. You can start seeds inside, transplant seedlings, or protect plants from frost. Here are some tips for using your cold frame effectively:

    • Monitor the temperature: Check the temperature inside the cold frame regularly. On sunny days, the temperature can rise significantly. You may need to open the lid to vent the frame and prevent overheating.
    • Water regularly: Keep the soil moist, but avoid overwatering. The cold frame's enclosed environment can trap moisture, so check the soil frequently.
    • Protect from pests: Use row covers or netting to prevent pests from accessing your plants.

    Conclusion

    Building a cold frame is a simple and rewarding project that can greatly benefit your gardening efforts. By following these step-by-step instructions, you'll be able to extend your gardening season and enjoy fresh vegetables and flowers all year round.

    Creating a Cozy Squirrel Den Box: PDF Guide

    Posted by Alton with No comments
    Creating a Cozy Squirrel Den Box: PDF Guide

    Creating a Cozy Squirrel Den Box: A Step-by-Step Guide

    Hey there, fellow nature lovers! Are you looking for a fun and rewarding way to help our furry friends, the squirrels? Well, you’ve come to the right place. Today, we’re going to dive into the exciting world of building squirrel den boxes â€" a cozy haven for these energetic creatures. It’s a project that’s surprisingly simple, rewarding, and a great way to connect with nature.

    Building a squirrel den box isn’t just about giving them a place to sleep; it’s about providing them with a safe space to raise their young, escape from predators, and weather the storms. Think of it as a tiny, adorable apartment building for squirrels, and you, the architect! Let’s get started, shall we?

    Why Build a Squirrel Den Box?

    You might be wondering why bother creating a squirrel den box in the first place. Well, there are actually quite a few reasons why it’s a great idea! Here are a few:

    • Providing Shelter: Squirrels need safe havens, especially during harsh weather conditions. A den box provides a cozy retreat from rain, wind, and snow. Imagine yourself snuggled up in a warm blanket on a cold day â€" that’s what a den box means to a squirrel!
    • Raising Young: Squirrels build their nests in trees, but sometimes they need a little extra help. A den box offers a safe, secure space for them to raise their young, protected from predators and the elements.
    • Encouraging Biodiversity: Squirrels are an essential part of the ecosystem. They help with seed dispersal and control insect populations. By providing them with a safe haven, you're contributing to a healthy and balanced ecosystem.
    • Just Plain Fun! Building a den box is a fun and rewarding project. It's a great way to get outdoors, use your creativity, and connect with nature. And, who knows, you might even get a glimpse of a happy squirrel family enjoying their new home.

    What You’ll Need to Build Your Den Box

    Before you start hammering and sawing, make sure you’ve got all the essentials! Don’t worry, this isn't a complicated project. You’ll need a few basic tools and materials:

    • Wood: Use untreated, rot-resistant wood like cedar or redwood. You’ll need boards about 1" thick, and you can either use pre-cut lumber or cut it yourself. Don’t use pressure-treated wood; it can be harmful to squirrels!
    • Screws: Use wood screws long enough to secure the wood together. Don’t use nails; they can work loose over time.
    • Saw: A handsaw or circular saw will be helpful for cutting the wood to size. You can also buy pre-cut lumber, but cutting it yourself can be more satisfying!
    • Drill: A drill is necessary for pre-drilling holes for the screws, making it easier to assemble the box and prevent the wood from splitting.
    • Measuring Tape: You’ll need this to measure the wood accurately for a perfect fit.
    • Pencil: A pencil is essential for marking the wood where you need to cut or drill.
    • Level: This helps you ensure the box is straight and level before you secure it to the tree.
    • Safety Glasses: Protect your eyes while working with power tools and sharp objects.

    Step-by-Step Guide to Building a Squirrel Den Box

    Okay, so now you’ve got all the tools and materials, let’s get started! We’re going to build a basic den box that’s easy to construct and attractive to squirrels. Follow these steps:

    1. Choose Your Box Dimensions

    The dimensions of your squirrel den box are important for the squirrel’s comfort. Here’s a good starting point:

    • Length: 12 inches
    • Width: 10 inches
    • Height: 12 inches

    However, you can adjust the dimensions to fit your needs. Just remember, the box should be big enough for the squirrels to move around comfortably but not too big that it becomes a cold draft.

    2. Cut the Wood

    Now, it’s time to get your saw out and start cutting the wood to size! You’ll need the following pieces:

    • Two side panels: 12 inches high x 10 inches wide
    • One bottom panel: 12 inches long x 10 inches wide
    • One back panel: 12 inches high x 10 inches wide
    • One front panel: 12 inches high x 10 inches wide
    • One roof panel: 12 inches long x 10 inches wide
    • One entrance panel: 4 inches high x 4 inches wide (you can adjust this size if you want a larger entrance)

    3. Assemble the Box

    Now it’s time to put your box together! You’ll want to assemble it so that the bottom panel forms the base, and the back, front, and side panels make up the walls. Here’s how to assemble it:

    1. Attach the side panels to the bottom panel: Use screws to attach the two side panels to the bottom panel. Make sure the panels are flush with each other and that the screws are long enough to go through all the layers of wood.
    2. Attach the back panel: Attach the back panel to the bottom and side panels. Make sure the edges are flush and that the screws are secure.
    3. Attach the front panel: Do the same thing for the front panel, securing it to the bottom and side panels. This will create a basic box shape.
    4. Create the entrance hole: Measure and mark the position of the entrance hole on the front panel. Then, use your saw to cut out the entrance hole. Be careful not to make the hole too big or too small.
    5. Attach the roof panel: Now, it’s time to add the roof. Use screws to attach the roof panel to the back, front, and side panels of the box, making sure it overhangs the walls slightly for extra protection from the elements.

    4. Add Finishing Touches

    Your squirrel den box is almost ready! Here are a few finishing touches to make it extra cozy and welcoming:

    • Add a ledge: Create a ledge below the entrance by attaching a small piece of wood to the front panel, allowing the squirrels to easily jump in and out of the box.
    • Smooth rough edges: Use sandpaper to smooth out any rough edges on the wood to prevent splinters and make the box comfortable for the squirrels.
    • Paint or stain (optional): You can paint the exterior of the box with a natural, non-toxic paint or stain it with a wood-safe sealant. This will help to protect the wood and add a decorative touch.

    Installing Your Squirrel Den Box

    Your cozy squirrel den box is now complete! But it’s not ready for its new furry residents just yet. Here's how to make it a welcoming home:

    1. Find the Perfect Spot

    Before you install the box, choose a location that squirrels will love. Here are some things to consider:

    • Height: The box should be at least 10 feet off the ground, to provide a safe distance from predators.
    • Tree Type: Choose a sturdy tree with branches that are large enough to support the box.
    • Visibility: Make sure the box is visible from a distance, so squirrels can easily find it.
    • Away from Disturbances: Select a spot that is away from busy areas and high traffic zones.

    2. Secure the Box to the Tree

    Now it’s time to attach the box to your chosen tree. Here’s how to do it:

    1. Use sturdy brackets: Install brackets to the back of the box, ensuring they are strong enough to support the weight of the box. Make sure the brackets are long enough to securely hold the box to the tree.
    2. Attach brackets to the tree: Use sturdy screws to securely attach the brackets to the tree. Make sure you’re attaching the box to a solid branch or trunk.
    3. Level the box: Use a level to make sure the box is straight and level before you tighten the screws. A level box will ensure proper drainage and prevent water from pooling inside.

    3. Add a Little Extra Comfort

    To make the den box even more inviting, you can add some soft bedding materials. Here are some squirrel-approved options:

    • Shredded paper: Just like a cozy nest, shredded paper is a great option for lining the box. It absorbs moisture and provides a soft, comfortable surface.
    • Dried leaves: Dried leaves offer insulation and create a natural, welcoming feel.
    • Straw: Dry straw is another good choice for bedding, providing warmth and cushioning.

    Caring for Your Squirrel Den Box

    You’ve built the perfect den box, installed it in a prime location, and even added cozy bedding. Now, it’s time to take care of your squirrel haven! Here’s how to keep it in top shape:

    • Regular Inspection: Check the den box regularly for damage, wear and tear, or signs of pests. Make sure the entrance is clear and that the roof is secure. This will help prevent accidents or damage to the box.
    • Clean the box: You can clean the box with a mild soap and water solution. Make sure the box is completely dry before putting in fresh bedding.
    • Replace bedding: Replace the bedding every few months, or more often if it gets dirty or wet. This will help to keep the box clean and healthy for the squirrels.
    • Enjoy watching your furry tenants! Now you can enjoy watching the squirrels come and go, raise their young, and thrive in their new cozy haven. Remember, the purpose of the box is to offer a safe and comfortable shelter, not to trap them, so enjoy the natural beauty of their life!

    That’s it! Now you’re ready to be a squirrel den box builder extraordinaire! This is a project that’s both fun and rewarding. Remember, by providing a safe and welcoming home for squirrels, you’re not just helping these adorable creatures, you’re also contributing to a healthy and thriving ecosystem.

    Go forth and build! And don’t be afraid to get creative. Add your own unique touch to the design to make it truly special. After all, the more cozy and inviting the box, the happier your squirrel tenants will be!

    How to Build a Squirrel Box from Scratch

    Posted by Alton with No comments
    How to Build a Squirrel Box from Scratch

    Building a Squirrel Box from Scratch: A Fun and Rewarding DIY Project

    Bringing a bit of the wild into your backyard can be a rewarding experience, and a squirrel box is a great way to attract these playful creatures. Building a squirrel box from scratch allows you to customize the design to your liking and create a unique home for your furry neighbors. This project is ideal for beginners, as it involves basic carpentry skills and readily available materials.

    Gather Your Materials

    Before you start building, gather the necessary materials. A trip to your local hardware store will provide you with everything you need:

    • Wood: Choose weather-resistant wood like cedar, redwood, or pressure-treated pine. You'll need around 8-10 boards, each about 1 inch thick and 6-8 inches wide.
    • Screws: 1 1/4 inch wood screws for assembling the box and 1 1/2 inch screws for attaching the lid.
    • Hinges: Two heavy-duty hinges for the lid.
    • Hardware cloth: A piece of 1/2 inch hardware cloth, about 12 inches by 12 inches, to prevent squirrels from chewing through the entrance.
    • Paint or stain (optional): Protect the wood and add a decorative touch.
    • Measuring tape, pencil, saw, drill, and screwdriver: Basic carpentry tools.

    Building the Base

    Begin by constructing the base of the squirrel box. This forms the foundation of the entire structure. Follow these steps:

    1. Cut the base: Measure and cut a piece of wood for the base, approximately 12 inches by 12 inches.
    2. Cut the sides: Cut four pieces of wood to form the sides of the box. Each piece should be about 12 inches long and 6-8 inches high.
    3. Attach the sides: Secure the sides to the base using wood screws. Drill pilot holes before screwing to prevent the wood from splitting.
    4. Cut the back: Cut a piece of wood for the back of the box. This should be 12 inches wide and 6-8 inches high.
    5. Attach the back: Secure the back panel to the sides using wood screws.

    Creating the Entrance

    Next, create the entrance hole for the squirrel box. This is crucial to ensure the squirrels can easily access their new home.

    1. Measure and cut: Cut a hole in the front panel of the box, approximately 4 inches in diameter. This provides a comfortable entrance for squirrels.
    2. Install hardware cloth: Cut a piece of hardware cloth slightly larger than the hole. Secure it around the opening with screws. This prevents squirrels from chewing through the entrance and escaping.

    Adding the Lid

    A secure lid is essential to keep the squirrels safe and dry. Constructing the lid is similar to building the base.

    1. Cut the lid: Cut a piece of wood for the lid, slightly larger than the top of the box. This allows for a snug fit and prevents rain from entering.
    2. Attach hinges: Install the hinges on the underside of the lid. Make sure the hinges are strong enough to support the weight of the lid.
    3. Secure the lid: Attach the lid to the box using screws and create a simple latch for easy access.

    Finishing Touches

    After you've assembled the squirrel box, take the time to give it some finishing touches. This can improve its aesthetics and longevity.

    1. Sand the surfaces: Smooth out any rough edges and imperfections with sandpaper.
    2. Paint or stain: Add a coat of paint or stain to protect the wood and enhance its appearance. Choose a color that blends well with your surroundings.
    3. Add a perch: Create a small perch for squirrels to stand on outside the entrance. This can be made from a piece of wood or a sturdy branch.

    Installing Your Squirrel Box

    Once you've completed your squirrel box, it's time to install it in your backyard. Choose a location that provides shelter from the elements and offers a clear view of the surroundings.

    1. Mount the box: Secure the box to a tree or post using sturdy brackets or straps. Make sure the box is at least 6 feet off the ground to discourage predators.
    2. Orient the entrance: Face the entrance away from the prevailing wind and rain to protect the squirrels inside.

    Enjoy Watching the Squirrels

    With your squirrel box in place, you can sit back and enjoy watching these fascinating creatures. Be sure to keep a safe distance and observe them from afar to avoid disturbing their natural behavior. Building a squirrel box from scratch is a fun and rewarding project that allows you to connect with nature and provide a safe haven for local wildlife. So gather your tools, embrace your creativity, and get started on this fulfilling DIY project.

    Diy wooden wall clock guide for beginners

    Posted by Alton with No comments
    Diy wooden wall clock guide for beginners

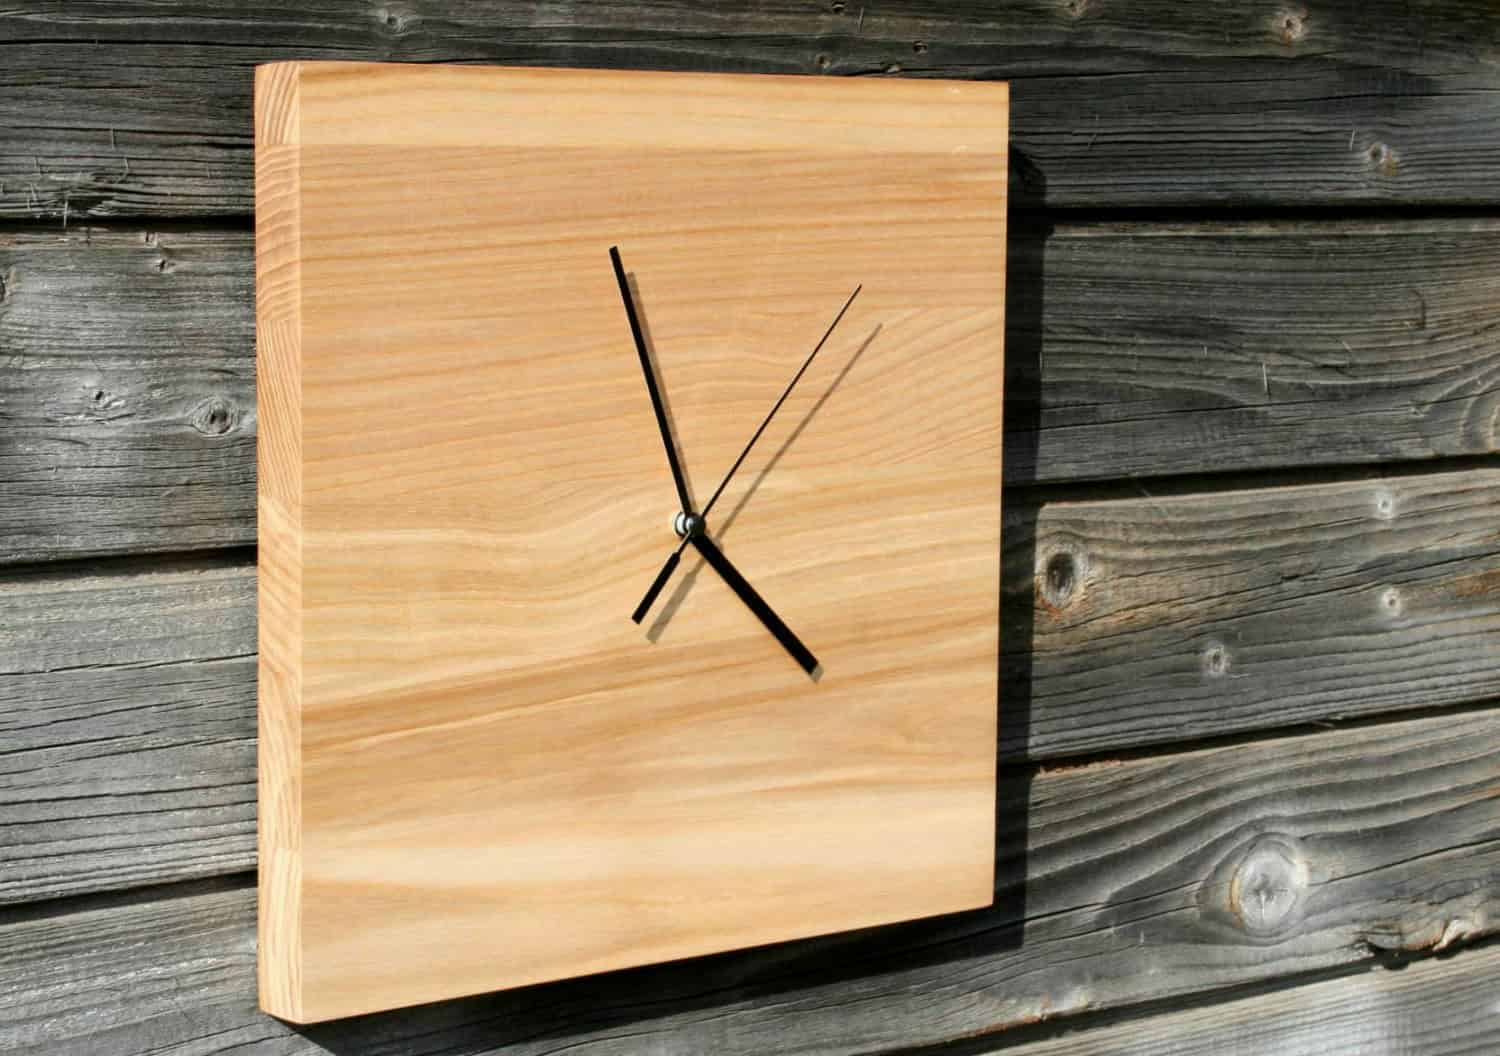
    Clocking In: Your Guide to Building a DIY Wooden Wall Clock

    Alright, fellow crafters, are you ready to tick-tock your way into a fun and rewarding project? Building a DIY wooden wall clock isn't as daunting as it might sound. With a little bit of wood, some basic tools, and a whole lot of enthusiasm, you can create a unique timepiece that'll be the envy of your friends and family.

    We're going to break down this project step-by-step, so even if you're a woodworking newbie, you'll be able to hang your masterpiece on the wall in no time. Let's get started!

    Gathering Your Gear: What You'll Need

    First things first, we need to make sure you have all the right tools and materials. Don't worry, the list isn't too long:

    • Wood: Choose a piece of wood that's at least 12 inches in diameter for a standard clock face. Plywood, MDF, or even a reclaimed piece of wood with some character would work great!
    • Clock Movement Kit: This kit includes the clock hands, a quartz movement, and a mounting nut. You can find these at most craft stores or online.
    • Saw: You'll need a saw to cut the wood into a circle. A jigsaw or a scroll saw will work best.
    • Sandpaper: Get a variety of grits, from coarse to fine, for smoothing out the wood.
    • Pencil: For marking out the clock face and any designs you want to add.
    • Ruler: For measuring and making sure your clock face is symmetrical.
    • Drill: For drilling the hole for the clock movement.
    • Drill Bit: Make sure the bit is the right size for the clock movement's mounting nut.
    • Wood Glue: For attaching any decorative elements to the clock face.
    • Clamps: For holding pieces of wood together while the glue dries.
    • Paint or Stain: Give your clock a finishing touch with a coat of paint or stain.
    • Clock Hands: Don't forget the clock hands! These come in various styles and sizes, so choose ones that match your vision.
    • Clock Numbers or Markers: These are optional, but they can add a bit of flair to your clock.
    • Hook or Hanging Hardware: To hang your finished clock on the wall.

    Now that we've got our tools and materials ready, it's time to get down to business!

    Step 1: Shaping Your Clock Face

    The first step is to cut your chosen piece of wood into a circle. This is where your saw comes in handy. If you're using a jigsaw, make sure to use a fine-tooth blade for a cleaner cut.

    Here's a tip: If you don't have a compass large enough to draw a perfect circle on your wood, you can use a piece of string and a pencil. Tie the string to a pencil and then attach the other end to a nail or tack placed at the center of your wood. Hold the string taut and use the pencil to draw a circle around the nail.

    Once you've got your circle cut out, take some sandpaper and smooth out any rough edges. Start with a coarse grit and work your way down to a finer grit for a smooth finish.

    Step 2: Centering Your Clock Movement

    This is where precision comes in. We need to find the exact center of our clock face.

    There are a couple of ways to do this. One method is to draw two lines across the circle, intersecting at the center. Another way is to use a ruler to measure the diameter of the circle and then draw a line through the center, marking the midpoint. Repeat this process for another diameter, creating a cross at the center.

    Once you've found the center, use your drill to create a hole for the clock movement's mounting nut. Make sure the hole is the right size to accommodate the nut, and drill slowly and carefully to avoid any splintering.

    Step 3: Adding Your Personal Touch

    Now, this is where you get to unleash your creativity! There are so many ways to personalize your wooden clock.

    Here are a few ideas:

    • Paint or Stain: Give your clock a fresh look with a coat of paint or stain. You can choose a bold color or a natural wood finish, depending on your style.
    • Decorative Elements: Glue on some decorative elements like small pieces of wood, seashells, or even fabric scraps to create a unique design.
    • Numbers or Markers: You can use stencils or paint your own numbers on the clock face to indicate the hours. Or, get creative and use other markers like Roman numerals or even pictures!
    • Carving: If you're feeling adventurous, try carving a simple design or your initials onto the clock face.

    Let your imagination run wild! This is your chance to create a clock that truly reflects your personality.

    Step 4: Assembling the Clock Movement

    Now it's time to put the clock movement together. Follow the instructions that came with your clock movement kit.

    First, attach the clock hands to the movement. They usually have small tabs or slots for attaching the hands, so be sure to follow the manufacturer's instructions.

    Next, carefully insert the movement into the hole you drilled in the clock face. Make sure the nut is securely tightened to hold the movement in place.

    Now you're ready to test your masterpiece!

    Step 5: Testing and Hanging Your Clock

    Insert the battery into the clock movement, and watch as the hands start to tick away. Make sure the clock is keeping accurate time before hanging it on the wall.

    You can attach a hook to the back of your clock for easy hanging. You can also use hanging hardware, such as D-rings and wire, for a more secure hold.

    There you have it! You've just created a stunning, one-of-a-kind DIY wooden wall clock that you can proudly display in your home.

    Finishing Touches and Tips

    Once your clock is up on the wall, you might want to add a few finishing touches to make it even more special.

    • Varnish or Sealant: Consider applying a protective varnish or sealant to your clock to help protect the wood and keep it looking its best.
    • Personalized Touch: Add a personal touch by etching your initials or a special date onto the back of the clock.
    • Create a Set: Consider making a matching set of clocks, perhaps with different styles or designs. This could be a wonderful project for a family or friends.

    And remember, building a DIY wooden wall clock isn't just about creating a functional timepiece. It's about the journey â€" the joy of working with your hands, the satisfaction of seeing your vision come to life, and the pride of creating something unique and meaningful. So, go ahead, unleash your inner craftsman and get clockin'!

    Step-by-Step Cold Frame Guide for Winter Gardening

    Posted by Alton with No comments
    Step-by-Step Cold Frame Guide for Winter Gardening

    Build a Cold Frame for Winter Gardening Success

    Winter doesn't have to mean a complete halt to your gardening adventures. A cold frame, a simple yet ingenious structure, allows you to extend your growing season into the cooler months. Imagine harvesting fresh greens, starting seedlings, and nurturing tender plants â€" all through the heart of winter! This guide will walk you through the steps of building a cold frame, helping you turn your winter garden dreams into a reality.

    Understanding Cold Frames: A Mini Greenhouse

    A cold frame essentially acts like a miniature greenhouse. It traps solar heat and insulates the plants within, creating a microclimate warmer than the surrounding air. This allows you to grow a variety of cool-season crops, start seeds early, and even harden off seedlings before transplanting them outdoors.

    Materials for Your Cold Frame

    To build a basic cold frame, you'll need the following:

    • Wooden frame: Use pressure-treated lumber for longevity. Dimensions will vary depending on your needs, but a standard size is 4 feet wide by 6 feet long.
    • Glass or polycarbonate panels: These will cover the top of the frame to let in sunlight and trap heat. Glass is durable but heavy; polycarbonate is lighter and more impact-resistant.
    • Hinges: Attach the cover to the frame securely.
    • Handles or latches: For easy access and opening/closing.
    • Screws or nails: For assembling the frame and attaching the cover.
    • Soil: High-quality potting mix or garden soil enriched with compost.
    • Optional: Insulation (styrofoam or bubble wrap), ventilation materials (screens or vents), and a thermometer.

    Step-by-Step Cold Frame Construction

    Now, let's build your cold frame! Here's a detailed step-by-step guide:

    Step 1: Choose a Location

    Select a sunny spot in your garden. Ideally, the cold frame should receive at least 6 hours of direct sunlight each day. Ensure the area is well-drained to prevent waterlogging.

    Step 2: Assemble the Frame

    Cut your lumber to size and use screws or nails to construct a rectangular frame. The frame should be about 12-18 inches high. You can create a simple box shape or build a more elaborate design with angled walls for extra strength.

    Step 3: Attach the Cover

    Carefully measure and cut your glass or polycarbonate panels to fit the frame. Attach them securely using hinges and handles. Consider adding a vent to the cover for controlling ventilation and temperature.

    Step 4: Prepare the Soil

    Fill the inside of the cold frame with your chosen soil. A layer of compost will provide extra nutrients and improve drainage.

    Step 5: Insulation (Optional)

    For extra warmth during frigid temperatures, you can add insulation beneath the soil. This will further boost the cold frame's ability to hold heat.

    Caring for Your Cold Frame

    With your cold frame built, it's time to start growing! Here's how to maintain it for optimal results:

    Watering

    Monitor the moisture levels in your cold frame regularly. Water as needed, ensuring the soil is evenly moist but not waterlogged.

    Ventilation

    Temperature control is key. On warm days, open the cover to vent the frame and prevent overheating. On cold days, keep the cover closed to trap heat.

    Maintenance

    Clean the cover regularly to maximize light penetration. Remove any debris or leaves that could block sunlight.

    Winter Gardening with Your Cold Frame

    Now, the fun part! You can grow a variety of cold-hardy vegetables and greens in your cold frame. Here are some excellent choices:

    • Lettuce: A classic cold-weather crop that thrives in a cold frame.
    • Spinach: A nutritious leafy green that tolerates cold conditions.
    • Kale: A hardy green that can withstand even freezing temperatures.
    • Radishes: These quick-growing root vegetables are perfect for cold frame cultivation.
    • Carrots: You can even grow early-season carrots in your cold frame.
    • Broccoli: Start broccoli seedlings indoors and then transplant them to your cold frame.
    • Cauliflower: Similar to broccoli, cauliflower benefits from the protection of a cold frame.

    Don't hesitate to experiment with other cool-season crops. Enjoy fresh, homegrown produce throughout the winter, and discover the magic of cold frame gardening!

    Step-by-step instructions for building an industrial wood desk

    Posted by Alton with No comments
    Step-by-step instructions for building an industrial wood desk

    Building an Industrial Wood Desk

    An industrial-style desk is a statement piece that can add a touch of rugged charm and functionality to any workspace. Its sturdy construction and minimalist design make it ideal for both home offices and creative studios. This guide will provide you with a detailed, step-by-step plan to build your own industrial wood desk, combining the warmth of natural wood with the edgy aesthetic of industrial elements.

    Materials and Tools

    Before you begin, gather the following materials and tools:

    Materials:

    • Two 8-foot long 2x12 boards (for the desktop)
    • Two 4-foot long 2x4 boards (for the legs)
    • Two 2-foot long 2x4 boards (for the support beams)
    • One 4-foot long 1x2 board (for the drawer front)
    • One 12-inch long 1x2 board (for the drawer handle)
    • Wood screws (various sizes)
    • Wood glue
    • Sandpaper (various grits)
    • Wood stain (optional)
    • Polyurethane sealant (optional)
    • Drawer slides
    • Cast iron pipe fittings (optional, for legs)

    Tools:

    • Circular saw or miter saw
    • Drill
    • Screwdriver
    • Measuring tape
    • Level
    • Clamps
    • Safety glasses
    • Dust mask

    Step 1: Cut the Wood

    Using your saw, cut the lumber to the following dimensions:

    • Desktop: Two pieces of 2x12 board, each measuring 48 inches long.
    • Legs: Two pieces of 2x4 board, each measuring 29 inches long.
    • Support Beams: Two pieces of 2x4 board, each measuring 24 inches long.
    • Drawer Front: One piece of 1x2 board measuring 16 inches long.
    • Drawer Handle: One piece of 1x2 board measuring 12 inches long.

    Step 2: Assemble the Legs

    The legs will be attached to the support beams. This step can be done using either wood screws or cast iron pipe fittings.

    Wood Screw Method:

    1. Align the two support beams, and attach them to the legs using wood screws. You can use three screws on each side of the beams, ensuring they are securely attached.
    2. Use a level to ensure the legs are perpendicular to the support beams. Adjust the screws if needed.

    Cast Iron Pipe Method:

    1. Drill holes at the top and bottom of each leg, corresponding with the size of your cast iron pipe fittings.
    2. Insert the pipe fittings into the holes, and use a wrench to tighten them.
    3. Attach the support beams to the pipe fittings using additional pipe fittings, creating a secure connection.

    Step 3: Build the Drawer

    1. Cut two pieces of plywood to the size of your desired drawer, leaving a slight margin for the drawer sides.
    2. Attach the drawer front to the plywood using wood glue and screws.
    3. Cut two pieces of 1x2 lumber for the sides of the drawer. Their height will be the height of the drawer minus the thickness of the bottom. Attach these sides to the front and back pieces of the drawer.
    4. Attach the drawer slides to the sides of the drawer.

    Step 4: Assemble the Desk Frame

    1. Align the two support beams with the legs, and attach them using wood screws. Make sure the legs are spaced evenly apart.
    2. Attach the drawer front to the underside of the desktop, ensuring it is level and centered.
    3. Attach the drawer slides to the underside of the desktop, positioning them so the drawer will slide in smoothly.

    Step 5: Finishing Touches

    1. Sand the entire desk, starting with a coarse grit sandpaper and gradually moving to a finer grit. This will smooth out any rough edges and prepare the surface for staining or sealing.
    2. If desired, apply a wood stain to the desk. Use a brush or cloth to evenly coat the surface, allowing it to dry completely before moving on to the next step.
    3. Apply a polyurethane sealant to the desktop and the legs. This will protect the wood from scratches and moisture. Allow the sealant to dry thoroughly before using the desk.

    Step 6: Enjoy Your New Desk!

    Congratulations! You have successfully built a sturdy and stylish industrial wood desk. With its unique charm and functional design, this desk will be the perfect addition to your home office or workspace. You can further customize the desk by adding additional storage features, such as shelves or a small hutch, to enhance its functionality.