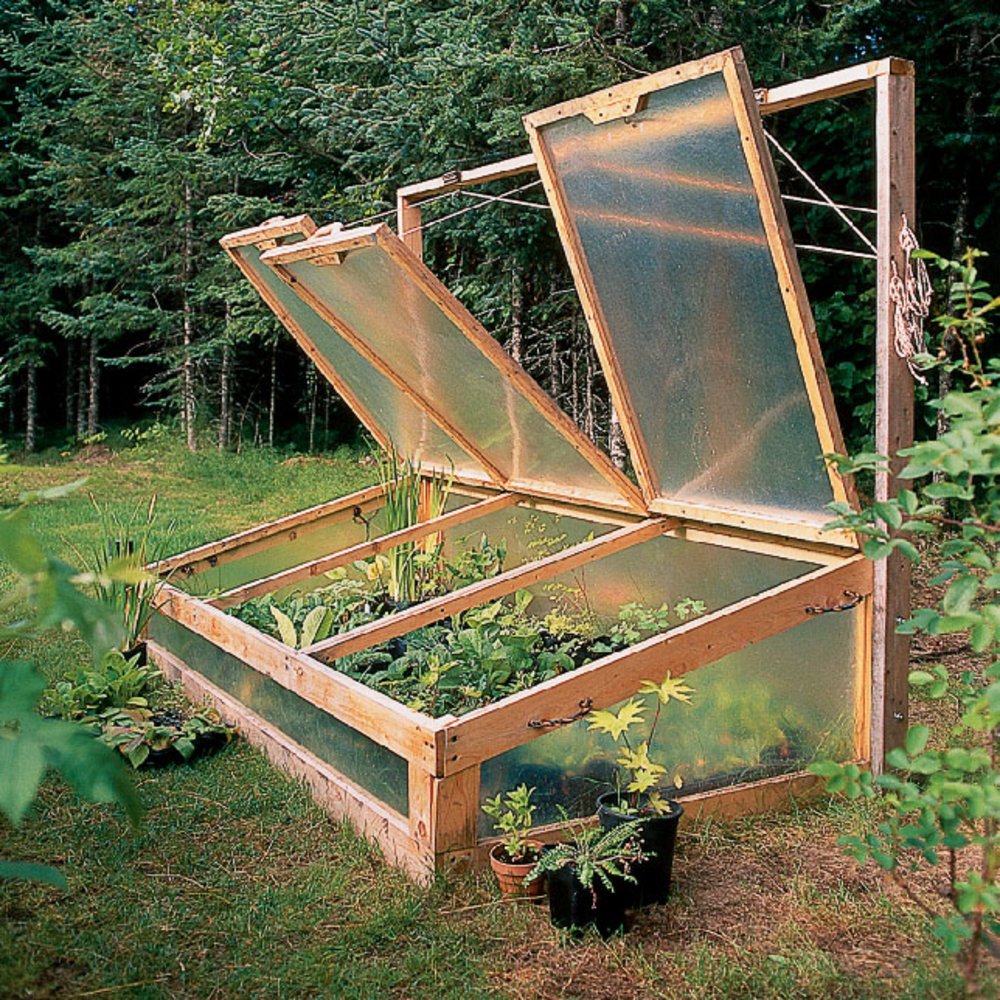
Building a Cold Frame: A Step-by-Step Guide
A cold frame is a simple, low-cost structure that extends your gardening season, allowing you to start seeds early in the spring or protect delicate plants during the fall and winter. Building a cold frame is a rewarding project that requires basic construction skills and readily available materials. This guide provides a step-by-step process to help you create your own cold frame.
Materials You'll Need:
Before you begin, gather the following materials:
- Wood for the frame: Use pressure-treated lumber for longevity. Choose 2x4s for the sides and 2x6s for the base.
- Glass or polycarbonate panels: These materials will provide insulation and sunlight. Glass is more affordable but heavier and more prone to breakage. Polycarbonate is lighter, more durable, and offers better insulation.
- Hinges: Choose heavy-duty hinges to support the lid.
- Screws: Use exterior-grade screws for both wood and glass/polycarbonate.
- Silicone sealant: Apply sealant to ensure a watertight seal around the glass/polycarbonate panels.
- Staple gun and staples: Use these to secure the glass/polycarbonate panels to the frame.
- Measuring tape, saw, drill, and screwdriver: These are essential tools for construction.
- Safety glasses and gloves: Protect yourself while working.
Step 1: Determine the Size and Location
Choose a location for your cold frame that receives at least 6 hours of sunlight per day. The area should be relatively level and well-drained. Consider the size you need based on the plants you'll be growing.
Step 2: Build the Frame
- Cut the wood to size: Use a saw to cut the 2x6s for the base and the 2x4s for the sides. Measure carefully to ensure the frame is square and fits the desired dimensions.
- Assemble the base: Screw together the 2x6s to form the rectangular base. Ensure the corners are secure.
- Attach the sides: Screw the 2x4s vertically to the base, forming the sides of the cold frame. Ensure the sides are level and plumb.
- Reinforce the frame: Add additional support by installing bracing across the sides.
Step 3: Install the Lid
- Cut the lid panels: Measure the interior dimensions of the frame and cut the glass or polycarbonate panels to size.
- Attach the hinges: Screw the hinges to the frame, ensuring they are positioned securely.
- Secure the panels: If using glass, apply silicone sealant to the edges of the panels and then attach them to the frame with screws. For polycarbonate, use a staple gun to secure the panels to the frame.
- Add a handle: Attach a handle to the lid for easy opening and closing.
Step 4: Finishing Touches
- Paint or stain (optional): Add a coat of paint or stain to protect the wood and enhance the appearance of your cold frame.
- Fill with soil: Prepare the soil inside the cold frame by adding compost or other amendments.
- Add a ventilation system: A small window or vent can be added to the lid to regulate temperature and humidity.
Using Your Cold Frame
Once your cold frame is built, it's ready to use. You can start seeds inside, transplant seedlings, or protect plants from frost. Here are some tips for using your cold frame effectively:
- Monitor the temperature: Check the temperature inside the cold frame regularly. On sunny days, the temperature can rise significantly. You may need to open the lid to vent the frame and prevent overheating.
- Water regularly: Keep the soil moist, but avoid overwatering. The cold frame's enclosed environment can trap moisture, so check the soil frequently.
- Protect from pests: Use row covers or netting to prevent pests from accessing your plants.
Conclusion
Building a cold frame is a simple and rewarding project that can greatly benefit your gardening efforts. By following these step-by-step instructions, you'll be able to extend your gardening season and enjoy fresh vegetables and flowers all year round.


0 comments:
Post a Comment
Note: Only a member of this blog may post a comment.