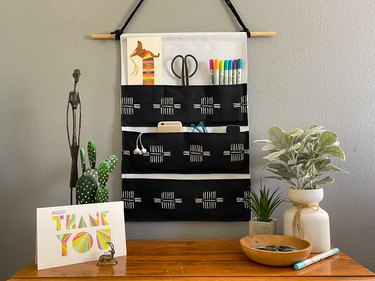
Hey there, space-saving superheroes! You know the struggle. Tiny apartment, overflowing with stuff, and a constant feeling of claustrophobia. But fear not, my fellow minimalist warriors! Today, we're diving into the world of DIY and crafting a super cool, space-saving wooden wall hanging organizer.
Think of it like a magical closet in miniature, hanging gracefully on your wall and swallowing up all your clutter. It's perfect for everything from keys and mail to jewelry and art supplies. And the best part? It's super easy to make, even if you're a crafting newbie.
Let's Get Our Supplies
First things first, we need to gather our magical ingredients. Don't worry, this isn't a potion-making class, but it's just as fun!
Here's what you'll need:
Wood: Choose a nice piece of wood, preferably something sturdy and light. We're aiming for that minimalist look, so think about what style you want - a rustic pallet wood, a sleek piece of birch plywood, or maybe a fun, colorful piece of MDF.
Saw: You'll need a saw to cut the wood to your desired size. A jigsaw or circular saw will do the trick.
Sandpaper: Sandpaper is our secret weapon for achieving that smooth, polished look. You'll need different grits for different stages.
Drill: We'll need a drill to make holes for hooks or pegs.
Screws: These are our trusty helpers for attaching the hooks or pegs.
Hooks or pegs: Choose the ones that fit your needs and style. You can go for classic metal hooks, rustic wooden pegs, or even some whimsical knobs.
Paint or stain (optional): To give your organizer a personal touch, you can paint or stain it in your favorite color.
Creating Your Organizer: A Step-by-Step Adventure
Now that we have our magical supplies, let's begin our crafting adventure!
1. Measure and Cut: First, decide the size and shape of your organizer. Think about the space you have available and what you want to store on it. Then, carefully measure and cut your wood to size using your saw. Remember to wear safety goggles to protect your eyes, and don't forget the safety rules!
2. Sand it Down: Once your piece of wood is cut, it's time to give it a smooth, polished look. Use sandpaper to smooth out any rough edges and imperfections. Start with a coarser grit sandpaper and gradually work your way up to a finer grit for a super smooth finish. Think of it as giving your wood a relaxing spa day!
3. Decide on your Hanging Method: Now, we need to figure out how our organizer will hang. You can choose from various options, like:
Using D-rings: Drill holes in the top corners of your wood and attach D-rings. You can then hang it with a simple rope or chain.
Hanging with a Sawtooth Hanger: Attach a sawtooth hanger to the back of your organizer, and it will hang perfectly on any nail or hook.
Using a Rope or Chain: You can create a unique hanging effect by drilling two holes near the top of your wood and attaching a rope or chain.
4. Drill Holes and Attach Hooks: It's time to get creative and add your hooks or pegs! Use your drill to create holes in your wood where you want to place your hooks or pegs. Make sure the holes are deep enough to securely hold them. Then, screw them in with the screws.
5. Finishing Touches: Now, your organizer is almost ready to tackle the clutter! If you want to add some personal flair, you can paint or stain the wood in your favorite color. Just be sure to let it dry completely before adding your hooks or pegs.
Let's Get Organized!
Finally, your wooden wall-hanging organizer is complete! Now, it's time to put it to the test and conquer that clutter. Here are some ideas for how you can use your new organizer:
Kitchen: Hang your kitchen utensils, spices, or tea towels.
Bathroom: Store your towels, toiletries, or jewelry.
Bedroom: Hang your scarves, hats, or necklaces.
Entryway: Organize your keys, mail, or sunglasses.
The possibilities are endless! Let your creativity flow and adapt your organizer to suit your individual needs.
Tips for Success:
Measure twice, cut once: This age-old adage is especially important when working with wood. Double-check your measurements before making any cuts.
Don't overtighten screws: Overtightening screws can damage your wood. Tighten them just enough to hold the hooks or pegs securely.
Use a level: Ensure your organizer is straight and level before hanging it.
Experiment with different designs: Don't be afraid to get creative and try different shapes, sizes, and styles.
Have fun!: This is your opportunity to create something unique and functional, so enjoy the process.
Embrace the Power of Organization
So, there you have it, space-saving superheroes! Your very own, handcrafted wooden wall-hanging organizer. It's simple, stylish, and a perfect solution for tackling clutter in your small space. Now, go forth and conquer those disorganized corners with the power of DIY and a touch of organization magic!


0 comments:
Post a Comment
Note: Only a member of this blog may post a comment.