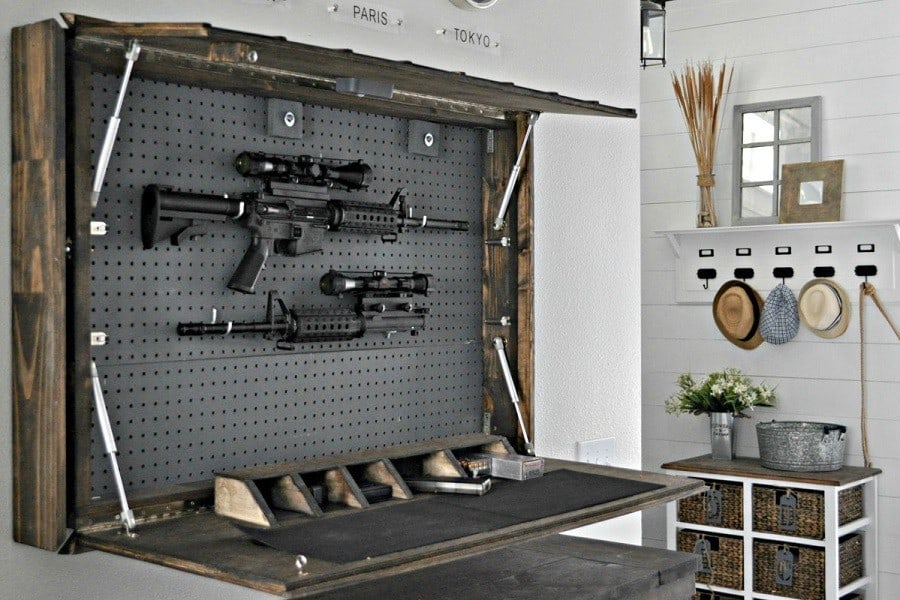
Safeguarding valuable firearms demands careful consideration, and a well-constructed gun box offers a crucial layer of protection. This comprehensive guide provides a detailed step-by-step process for building a sturdy wooden gun box, ensuring both secure storage and aesthetic appeal.
I. Planning and Design:
1. Define the Requirements:
Size and Dimensions: Determine the size of the box to accommodate the desired firearms, including potential future additions. Account for length, width, and depth, ensuring ample space for safe handling.
Security Features: Consider the level of security needed. Options include:
Locking Mechanism: Select a robust lock and hinge system, preferably tamper-proof.
Internal Organization: Incorporate features like adjustable shelves, dividers, or foam padding for organizing and protecting guns.
Fire Resistance: While not mandatory, fire-resistant materials can add an extra layer of safety.
Aesthetic Preferences: Choose wood type, finish, and overall design to complement existing decor or personal style.
2. Choose Materials:
Wood:
Hardwoods: Oak, maple, walnut, cherry, and mahogany offer superior strength and durability.
Softwoods: Pine, fir, and cedar are less expensive but may require additional reinforcement.
Plywood: A cost-effective option with good stability, often used for the box's core.
Hardware:
Hinges: Choose heavy-duty hinges that can support the weight of the box and its contents.
Lock and Key: Select a high-quality lock with a secure, tamper-proof mechanism.
Screws and Fasteners: Ensure the fasteners are long enough and appropriate for the chosen wood type.
Finishing Supplies:
Wood Stain: A suitable stain enhances the wood's natural beauty and provides protection.
Varnish or Polyurethane: A clear finish seals the wood and protects it from moisture, scratches, and wear.
Sandpaper: Prepare the wood surface for a smooth and even finish.
II. Construction Process:
1. Cut and Assemble the Box:
Cut Wood Pieces: Using a saw or table saw, cut the wood to the desired dimensions. Precision is crucial for a well-fitting box.
Construct the Base: Cut and join the base panels, ensuring the corners are square and tight. Use wood glue and screws for added strength.
Assemble the Sides: Cut and attach the side panels to the base, using wood glue and screws. Ensure the sides are vertical and flush with the base.
Attach the Top: Cut the top panel and secure it to the sides, using wood glue and screws. The top should fit snugly, allowing for a tight seal.
Reinforce the Corners: Add corner braces or blocks for added strength and rigidity.
2. Install the Locking Mechanism:
Drill Hinge Holes: Mark and drill pilot holes for the hinges, ensuring they are positioned accurately.
Attach the Hinges: Secure the hinges to the box lid and the box itself using screws.
Install the Lock: Mark and drill the hole for the lock, ensuring it is positioned securely and accurately.
Attach the Lock: Secure the lock to the box using screws. Test the lock mechanism to ensure proper functionality.
3. Add Internal Features:
Shelves and Dividers: Cut and attach shelves and dividers to organize the box's interior. Use wood glue and screws for secure attachment.
Padding: Line the interior with foam padding or fabric for added protection and cushioning.
Additional Features: Consider adding features like a felt lining, a small drawer for accessories, or a keyhole cover for enhanced security.
III. Finishing Touches:
1. Sanding and Finishing:
Sand the Surface: Smooth the entire surface of the box with sandpaper, starting with coarse grit and gradually moving to finer grits.
Apply Stain (Optional): Choose a suitable wood stain and apply it evenly to the box. Allow the stain to dry completely before applying the finish.
Apply Finish: Select a clear finish, such as varnish or polyurethane, to seal the wood and protect it from moisture, scratches, and wear. Apply several thin coats for maximum protection.
2. Enhance Security:
Install Security Hardware: Consider installing a security chain, a padlock loop, or additional locking mechanisms for enhanced protection.
Consider a Security System: Incorporate the gun box into a broader security system, potentially utilizing motion sensors, alarms, or remote monitoring.
IV. Maintenance and Care:
Regular Cleaning: Wipe the box regularly with a soft cloth to remove dust and debris.
Inspect Regularly: Check the locking mechanism and hinges for wear and tear.
Re-apply Finish: Re-apply a clear finish as needed to maintain the wood's protection.
Secure Storage: Always store the box in a safe and secure location, out of reach of unauthorized access.
V. Safety Considerations:
Always handle firearms with care: Never point a firearm at anything you do not intend to shoot.
Store firearms unloaded: Store firearms with the ammunition separate and locked in a different location.
Secure the box: Never leave the box unlocked or unattended.
Keep firearms out of reach of children: Always store firearms in a safe location that is inaccessible to children.
Conclusion:
Building a custom wooden gun box provides a personalized and secure solution for firearm storage. By carefully planning, selecting appropriate materials, and following the steps outlined above, you can create a durable and aesthetically pleasing box that protects valuable firearms and enhances overall security. Remember to prioritize safety and secure storage practices to ensure the responsible handling and protection of firearms.


0 comments:
Post a Comment
Note: Only a member of this blog may post a comment.